Pages

Saturday, August 27, 2011

Peach-Pear Jam


Peach-Pear Jam


You will need:

1 lb. Peaches (about 2)

and 1 lb. Pears. (about 2)

Peel, core and dice the fruit.


and crush it into small pieces.


Measure the Fruit.  You will need a total of 3 Cups (1-1/2 Cups Peaches and 1-1/2 Cups Pears).


Stir in 1  teaspoon  Lemon Zest
and 2   Tablespoons   Fresh Lemon Juice


and 5  Cups  Sugar


Let it rest for 10 minutes, stirring occasionally.


Turn around and notice that the Little One is making her Jam, too.


When the 10 minutes are up, place 3/4  Cup  Water and 1 (1.75-oz)  Box  Fruit Pectin (Sure-Jell) in a small saucepan and bring to a boil, stirring constantly.  Boil for 1 minute, stirring constantly.  Pour into Jam mixture, stir for 3 minutes.

Transfer to Freezer containers, seal and label.  Let set at room temperature for 24 hours, until set.  Store in Freezer.


Friday, August 26, 2011

Seed-Time & Harvest: Pear-Apple Pie for the Freezer


"While the earth remaineth, seedtime and harvest, and cold and heat, and summer and winter, and day and night shall not cease." Genesis 8: 22

That time of year is here again.  Harvest.  I've been busy preserving and freezing: Peach Cups for the children's school lunches, Corn (54 quarts last Saturday!), Peach-Pluot Jam, Green Beans, and now today, Pear-Apple Pie filling.  And tomorrow it will be Pear Jam.  Then comes Applesauce, Pizza Sauce and Tomatoes.  And if I'm lucky, I'll hit the October Strawberry harvest and will get some Strawberry Jam froze, too.

Canning and freezing takes a lot of work but it is so rewarding to me just to go sit in the cellar and look at all the full jars.  Maybe that sounds kind of funny, but it gives me a content sort of feeling to know that my family is 'fed' for the winter.  God's blessings to us are so big and so great and this is just a small visual reminder of his great love for me! 

Here is how I've made my Pear-Apple Pie for the freezer:

For the Filling:
Mix together in a large bowl:
6  Cups  thinly sliced peeled Pears
6  Cups  thinly sliced peeled Apples
1 1/2  Cups  Sugar
1/2  Cup  Flour
1  teaspoon  Cinnamon
1/2  teaspoon  Salt
and place it in a 1-gallon zip-top freezer bag.

For the Crumb Topping:
In a small bowl mix together:
1  Cup  Brown Sugar
1/2  Cup  Flour
1/2  Cup  Butter
and blend into coarse crumbs.
Stir in:
1  Cup  finely chopped Nuts (Pecans preferred)
and place this mixture in quart-size zip-top freezer bag.  Place this smaller bag inside the 1-gallon bag and seal the large bag.  Label bag and freeze.

To use you will need 2 unbaked 9-inch pie shells, each in a pie plate -OR- 1 greased 9x13 to use for a deep-dish cobbler.

Thaw the Pear-Apple filling and Crumb Topping.  Evenly divide the fruit mixture between the two prepared pie shells -OR- place into the prepared 9x13 dish.  Evenly top the fruit mixture with the crumb topping and cover loosely with foil.  Bake at 425* for 40 minutes.  Remove foil and continue baking 20 minutes.  Serve warm or at room temperature.

Makes 2 9-inch pies or 1 9x13 deep-dish cobbler.

Wednesday, August 24, 2011

Cheap Eats >> Zucchini Cakes


Perfect for a light Luncheon or a side dish for Dinner, these Zucchini Cakes are a fantastic way to use the over-abundance which squash loves to bestow upon us this time of year.  These little cakes are reminiscent of crab cakes and are yummy with a bit of cocktail sauce or ketchup for dipping.  This recipe does need a minimum 30 minutes of chill time before cooking, so plan ahead.


Zucchini Cakes

Prep:  20 minutes + 30 minutes chilling
Cook:  10 minutes per batch
Serves:  4

2  Cups  shredded Zucchini
1  Cup  Bread Crumbs
1/2  Cup  Quick-Cooking Oats
2  Tablespoons  finely chopped Onion
1  Tablespoon  Mayonnaise
1 1/2  teaspoon  Seafood Seasoning (Old Bay Seasoning)
1/2  teaspoon  prepared Mustard
2  Eggs, lightly beaten

4  teaspoons  Oil, for cooking

In a large bowl, combine the first seven ingredients.  Stir in eggs until well blended.  Cover and refrigerate for 30 minutes or longer.

Preheat the oil in a large non-stick skillet which has been coated with cooking spray.  Using a large cookie scoop (mine holds 3 Tablespoons), scoop the chilled Zucchini mixture into the hot skillet and flatten with the back of a pancake turner to approximately 1/2-inch thick.  Cook the Zucchini Cakes in the oil in batches for 3-4 minutes per side, or until golden brown.  Makes about 8 patties.

Adapted from Light & Tasty, June/July 2007

Saturday, August 20, 2011

Cheap Eats >> Spanish Rice


This is the recipe I was going to do earlier this week when I got hijacked by that Chocolate Blackout Cake recipe.  Why is it that new Dessert recipes take precedence over Cheap Eats, especially when all ingredients needed are on hand?  Hmm.... gotta think that one over.

Well, anyway.

This recipe may seem a little vague but that is because it is so versatile.  Don't have one item?  Switch it out for the next one listed.  The amounts I have listed will feed about 6 people.  So, here goes.


Spanish Rice

Ready in about 40 minutes

You will need:

One large non-stick skillet (with a lid), about 12 inches

1/2 to 1-1/2  lbs.  Ground Meat:  Beef -OR- Turkey
Onion, diced, to taste
3/4 to 1  Cup  White Rice
1  8-oz. can  Tomato Sauce -OR- 1 Cup Ketchup
1  14-oz  can Diced Tomatoes (plain or with chilies) -OR- 1 pt. Home-Canned Tomatoes -OR- 2 Cups diced fresh Tomatoes -OR- 2 Cups Salsa  lightly drain canned Tomatoes; do not drain Salsa or fresh Tomatoes
3  Cups  Liquid: Water -OR- Beef Broth -OR- Chicken Broth
Chili Powder, to taste
Salt and Pepper, to taste
Cheese

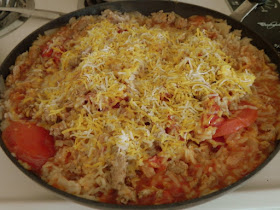
Brown the Ground Meat and Onion in skillet, drain off fat.  Add Liquid of choice, Tomato Sauce, and Diced Tomatoes; bring to a boil (decrease the amount of liquid by 1/2-cup if using 3/4-cup Rice).  Sprinkle with Rice and Chili Powder; reduce heat to a simmer and cover.  Cook, covered, until Rice is cooked through, about 30 minutes, stirring once half way through cooking time (it takes longer to cook Rice in a Tomato Sauce than it does in just water).  If, at the end of the cooking time, the Rice is done but there is excess Liquid just stir the Spanish Rice and raise the stove temperature to High and boil off  the remaining Liquid.  Taste, adding Salt and Pepper to taste.  Top with Cheese, cover off heat until Cheese is melted.

Enjoy!

Thursday, August 18, 2011

Little Brown Koko's Big Choc'lit Cake with Good, Thick, Sweet, Brown Choc'lit Frosting


Little Brown Koko

Once there was a little brown boy named Little Brown Koko. ... He had the blackest, little woolly head and great, big, round eyes, and he was the prettiest brown color, just like a bar of chocolate candy. 

One day Little Brown Koko's nice, good, ole Mammy made a big seven-layer cake with seven layers of good, thick, sweet, brown chocolate frosting.  She set it away in the pantry to save for Little Brown Koko's supper, and told him he must wait.

Well, Little Brown Koko waited--until his Mammy went to the hen house to gather eggs.  Then he ran over to the pantry, lifted the curtain, and looked long and hard at the big brown cake.  He looked, and looked.  Little Brown Koko's mouth watered.  He reached out one little, brown hand and touched the cake.  When he pulled his hand away it held a large hunk of frosting, which immediately went into Little Brown Koko's mouth.  Little Brown Koko rolled his big, round eyes and licked his fat, little, brown fingers and said, "Yum, yum."


Chocolate Blackout Cake

Serves: 10 to 12

Pudding Filling and Frosting:
1 1/4  Cups  Granulated Sugar
1/4  Cup  Cornstarch
1/2  teaspoon  Salt
2  Cups  Half-and-Half
1  Cup  Whole Milk
6  oz  Unsweetened Chocolate, chopped
2  teaspoons  Vanilla

Cake Layers:
8  Tablespoons (1 stick)  Butter
1 1/2  Cups  Flour
2  teaspoons  Baking Powder
1/2  teaspoon  Baking Soda
1/2  teaspoon  Salt
3/4  Cup  Cocoa, dutch-processed preferred
1  Cup  Brewed Coffee
1  Cup  Buttermilk
1  Cup  Light Brown Sugar
1  Cup  Sugar
2  Eggs
1  teaspoon  Vanilla Extract

For the Pudding:
Whisk Sugar, Cornstarch, Salt, Half-and-Half, and Milk in large saucepan.  Set pan over medium heat.  Add Chocolate and whisk constantly until Chocolate melts and mixture begins to bubble, 2 to 10 minutes.  Stir in Vanilla and transfer pudding to large bowl.  Place plastic wrap directly on surface of pudding and refrigerate until cold, AT LEAST 4 hours or up to 1 day.

For the Cake:
Adjust oven rack to middle position and heat oven to 325*.  Grease two 8-inch cake pans and dust with Cocoa Powder.  Whisk Flour, Baking Powder, Baking Soda, and Salt in bowl.

Melt Butter in large saucepan over medium heat.  Stir in Cocoa and cook until fragrant, about 1 minute.  Off heat, whisk in Coffee, Buttermilk, and Sugars until dissolved.  Whisk in Eggs and Vanilla.  Slowly whisk in Flour mixture, mixing well.

Divide batter evenly between prepared and bake until toothpick inserted in center comes out clean, 30 to 35 minutes.  Cool layers in pans 15 minutes, then invert onto wire rack.  Cool to room temperature, AT LEAST 1 hour.

To Assemble:
Cut each cake layer in half horizontally.  Crumble one half-layer into medium crumbs and set aside.  Place one half-layer on serving plate.  Spread 1 Cup Pudding over cake layer and top with another layer.  Repeat.  Spread remainin Pudding evenly over top and sides of cake.  Sprinkle Cake Crumbs evenly over tope and sides of cake, pressing lightly to adhere crumbs.  Cut and Serve.  Cake can be refrigerated for up to 2 days.


Little Brown Koko is a story much-loved by my husband during his growing-up years.  Little Brown Koko had a strong love for Choc'lit Cake and was always doing his best to get some more.  He usually ended up in trouble for snitching the cake but he never seemed reform.

I found the recipe for this cake in Cook's Country, Oct/Nov 2006.  The 'blackout' in the name refers to the blackout drills performed by the Civilian Defense Corps during World War II.

Be sure to give the pudding and the cake enough time to cool or you'll end up with runny pudding and gummy cake.

Monday, August 15, 2011

Fake It >> "Mama's" Home-Made Version of "Papa's" Grilled Chicken & Bacon Stuffed Pizza


Did you know that you can make Papa Murphy's-style stuffed Pizza at home?  Here's how to make the Grilled Chicken & Bacon Stuffed Pizza:

You will need:

2  recipes  of your favorite Pizza Dough, about 2 lbs total
1/2  Cup  Ranch Dressing, divided
3  cloves  Garlic, crushed, or to taste
1 1/2  Cups  Pizza Cheese, divided
6  oz  Cooked Chicken, diced  (grilled is best; if you don't have grilled, add 2 drops Liquid Smoke flavoring to the Ranch Dressing)
3  Roma  Tomatoes, diced and drained, divided
4  Tablespoons  Bacon, divided
4  Green Onions,  thinly sliced, divided

Mix together the Ranch Dressing and Garlic, set aside.

Roll out 1 recipe Pizza Dough (1 lb.) onto your baking sheet or pizza pan, allowing the dough to drape over the edges of the pan.  Roll out the remaining Pizza Dough on a well-floured board, let rest.

Spread the dough with 5 Tablespoons of the Garlic-Ranch Dressing.  Sprinkle with 1  Cup  Pizza Cheese, all of the diced cooked Chicken, 2  Roma Tomatoes, 2  Tablespoons Bacon and 3  Green Onions.

Top the Pizza with the prepared second half of the Dough, fold the bottom crust edges over the top crust and twist or crimp together to seal.

Spread the top Pizza dough with the remaining Garlic-Ranch Dressing, Cheese, Tomatoes, Bacon and Green Onions.

Bake at 375* for 25-30 minutes, or until done.

Makes a "Large" Stuffed Pizza, serves 5-6.

Enjoy a yummy pizza for a fraction of the cost of Papa Murphy's!

Friday, August 12, 2011

Easy Cinnamon Granola


Easy Cinnamon Granola

1 1/4  Cups  Oats (Quick or Old Fashioned, uncooked)
1/3  Cup  Brown Sugar, firmly packed
1/3  Cup  Butter, melted
1/3  Cup  Wheat Germ, Unprocessed Bran, or Chopped Nuts, as desired
1/4  teaspoon  Cinnamon

Combine all ingredients; mix well.  Cook in a 10-inch non-stick skillet over medium heat, stirring constantly, 5 to 7 minutes or until golden brown.  Allow to cool in pan, stirring occasionally to break up chunks.  When cool, store in a tightly-covered container in refrigerator up to 3 months.  Serve as topping over fruit salad, yogurt, ice cream or pudding.  Makes about 2 cups.

Yummy!


Thursday, August 11, 2011

Beefy Taco Bake


Beefy Taco Bake

30-Minute Meal
Serves:  6

2  (10-oz)  cans  Tomatoes with Green Chiles, one drained and one undrained
1  (16-oz)  can  Refried Beans
1  Tablespoon  Hot Sauce, or to taste
1/4  cup  chopped fresh Cilantro
3  cups  Mexican Cheese blend, divided
1 to 1 1/2  lbs  Ground Beef
1  (1.25-oz)  pkg  Taco Seasoning Mix
12  Taco Shells or 12 Corn Tortillas, warmed until flexible
3  Green Onions, sliced thin

Adjust oven rack to upper-middle position and heat to 475*.  Combine one can Tomatoes (drained), Refried Beans, Hot Sauce, and Cilantro; spread evenly in a greased 9 x 13 pan.  Sprinkle with one cup Mexican Cheese blend.

Cook Ground Beef in a large non-stick skillet over medium-high heat until no longer pink, about 5 minutes.  Drain off fat, then stir in Taco Seasoning and one can Tomatoes (undrained).  Simmer over medium-low heat until thickened and nearly dry, 5 to 7 minutes.

Spoon 1 Tablespoon Mexican Cheese Blend into each Taco Shell or Corn Tortilla and top with meat mixture.  Arrange tacos upright in bean mixture, cover with foil, and bake until bubbling, about 10 minutes.  Remove foil, top with remaining 1 1/4 cup Mexican Cheese Blend, and bake until cheese is melted, about 6 minutes.  Sprinkle with Green Onions.

Very Kid-Friendly!

Adapted from Cook's Country magazine, October/November 2007

Tuesday, August 9, 2011

Super Easy No-Knead Artisan Bread


I first got this recipe in the Recipe Circle Letter I participate in.  I've been playing with it and adapting it to get it the way I like it.  It really is super easy!

First, get out a big plastic or glass bowl with a lid.  I use my big tupperware bowl.  Just don't use a metal bowl.

Second, put the following ingredients into the bowl:

7 1/2  Cups  Flour --- My preference is White Flour but I've played around with using all Whole Wheat and a half White/half Wheat Flour
1  Tablespoon Yeast
1  Tablespoon Salt
3 3/4  Cups Warm Water
Optional:  Fresh Herbs --- Right now I'm on a Herbes de Provence kick; can't get enough of that savory Lavendar blend.  I use 2 Tablespoons.

Stir to moisten ingredients and put the lid loosely on top of the bowl.  Leave it on the counter.  After at least 2 hours (but up to 18 hours), the bread is ready to form into artisan boule loaves.  Nope, you don't knead it!


Third,  to form a boule, just gently scoop out half of the dough and gently blob it onto parchment paper which is resting on a cookie sheet (use one without sides; you will use this hard surface to transfer the dough to the oven).  Repeat with the remaining half of the dough on another piece of parchment.  Do your best to handle the dough as little as possible--don't squish out those air bubbles; they are what help make artisan bread 'artisan'.

Now, I personally don't like the way this bread bakes on just plain parchment--it spreads a little too much for me; I like a 'taller' loaf.  So here is what I do:  I take my Angel Food Cake pan (removing the bottom tube piece) and line it with a large piece of parchment paper, kind of like making a giant cupcake.  A cheesecake pan with the bottom removed will work, too.  Then I gently pour all of the bread dough into my 'mold' and let it rise.

Here's my mold:


And what it looks like before baking:


Fourth, let the dough rise for a total of 40 minutes.  After 20 minutes have passed, turn your oven on to 475* to preheat for 20 minutes.  Put a pizza stone or an upside-down cast iron skillet in the oven for the bread to bake on.  Make certain that the oven rack you plan to bake on is at the middle position.  Place a smaller pan filled with water on the bottom rack, underneath the pizza stone.  This water evaporating will create steam in the oven, resulting in a yummy crusty loaf.

Fifth, when 40 minutes have passed, open the oven and quickly slide the bread, mold, and parchment paper onto the hot pizza stone and shut the oven door as fast as you can to keep the steam in.

Sixth, bake for 35 minutes.  Remove from oven.  To maintain that crusty exterior, promplty remove from the parchment paper and cool on a cooling rack.  If you are baking the entire batch of dough in one loaf, you may need to add another 5-7 minutes to the bake time, depending on how your oven bakes.  I like to cover my bread with foil for the last 10 minutes of baking to prevent it from getting so dark.

Makes 2 (1.5-lb) or 1 (3-lb.) boules.


And here is is:  Pa amb Tomaquet!


Spicy Asian Green Beans


Spicy Asian Green Beans

Prep Time:  30 minutes
Cook Time:  10 minutes
Serves:  4

1  Tablespoon  Olive Oil
1  lb  fresh Green Beans, trimmed
1/4  Cup  coarsely chopped Onion
1/4  Cup  Hoisin Sauce  or substitute with 2 Tablespoons Oyster Sauce and 2 Tablespoons BBQ Sauce
2  Tablespoon  Soy Sauce
1  Tablespoon  Seasame Oil
1  Tablespoon  Water, or as needed
3  cloves  Garlic, minced
1  teaspoon minced fresh Ginger
2  teaspoons Chinese Chili Paste with Garlic or 1/4 tsp Red Pepper Flakes to taste
Toasted Seasame Seeds, for garnish  you can purchase these already toasted (and for much cheaper) in the Asian section at the grocery


Heat the Olive Oil in a large skillet over medium-high heat.  Add the Green Beans and Onion.  Cook, stiring occasionally, until the beans are crisp-tender and blackened in spots, about 5 to 10 minutes, depending on the thickness.

Meanwhile, whick the remaining ingredients (except the Seasame Seeds) in a small bowl.  Stir in more water as needed until the sauce has a cake-batter consistency.  Set aside.  If you are serving this to young children, go light on the Garlic Cloves and Ginger--taste before adding the full amount.

Remove the beans from the heat.  Add the sauce and stir until the beans are evenly coated.  Taste and adjust seasoning.  Transfer the beans to a platter and garnish with Seasame Seeds.  Serve warm.

Spicy and oh! so very yummy!  This is how I've been fixing our garden-fresh beans this summer.

Thursday, August 4, 2011

Cheap Eats >> Pa amb Tomaquet

  I have always had a fasination the country of Spain.  It started back when I was a child.  You see, my Grandfather was an almond grower and as a member of the Blue Diamond Growers he traveled to Spain as an ambassador for the almond growers in the USA.  Each time before he left for an oveseas trip our extended family would gather for an evening meal and a parting prayer for his safe travels.  Sometimes Grandma would travel with him, but if she didn't, she would have us grandchildren, two or three at a time, to eat out with her and then spend the night.  When Grandpa returned the family would again gather for a meal and view his slide photographs and then! what joy to the grandchildren! we would assemble in the living room and Grandpa would give each of us a memento of his trip.  I still have the little hand-tooled leather purse and the straw bag he brought back for me but the candy necklaces are long gone.

  But this wasn't all--each year at Christmas his friend Enrique would send Grandpa and Grandma several pounds of Spanish almond candy.  Both of these candies are made with the same ingredients:  Almonds and Honey.  Alicante Turron contains whole almonds and is crunchy.  But the Jijona Turron!  It is by far my favorite candy:  ground almonds mixed with clover honey to make a fudge-textured sweet.  It just isn't 'christmas' without Turron.  (If you want to order Turron for yourself, order it from the La Tienda link here.  I have ordered from La Tienda and have been very satisfied.)

  Fast forward to many years later.  Little did my husband and I know when we bought our first home that the house next door was owned by a local church and was its Missionary House.  Santi and Ruth were here for two years, raising support for their missionary work with Spanish families and teens.  They were newlyweds like us and we spend many hours together, sharing meals, talking on the front porch, making Flea Market runs and day trips to Yosemite.

Here we are at Yosemite Falls

The first time Santi & Ruth had us over for a meal she made Pa amb Tomaquet, which simple means "Bread and Tomato" in the Catalan language.   If I would have known what it was before I ate it, I probably wouldn't have thought it quite so good (it's funny how knowing what something is 'pre-determines' your opinion of it, isn't it?).  So please, give this a try with an open mind.

Pa Amb Tomaquet

You will need:

Tomatoes--good, vine-ripe, garden-fresh tomatoes
Olive Oil
Salt
Black Pepper
Crusty Artesian Bread (I'll share my recipe in a following post)

Take your Tomato and cut it in half from top to bottom.  Using a box grater set in a dish, grate out the inside of the Tomato, discarding the skin.


Stir in a splash of Olive Oil--you don't want much, just enough to give it a slight sheen.  Sprinkle with Salt and Black Pepper to taste.  Spread onto warm, crusty Artesian Bread and savor the taste of summer and Spain.

Now, if you aren't certain about this, take it one step farther:  Gently warm about two crushed Garlic Cloves in a tablespoon or two of Olive Oil and stir it into the Pa amb Tomaquet.  Then toss it all over cooked Angel Hair pasta for a fresh, quick, light summer supper. 

It's what we are having for dinner tonight!

So, tell me, did you try it?  Was it good?

And here is a Dinner Hymn shared by Santi & Ruth:

Gracias
Gracias por la comida
Gracias a los de la cocina
Gracias de mi corazon, wooo.
Gracias es lo que digo
Gracias tambien por mis amigos
Gracias sobre todo a Dios
Gracias a Dios

Thank you for the food
Thank you to those in the kitchen
Thank you for my heart, wooo.
Thank you, is what I say
Thank you also for my friends,
And above all, thank you God!
Thank you God!

Wednesday, August 3, 2011

Flambe' Tri-Tip Pave' with Grilled Caprese Salad

Ok, first about that delicious-sounding Flambe' Tri-Tip Pave'.  Here's how I caught the Tri-Tip on fire and dropped it on the pavement:

A week ago was my husband's birthday.  We were camping and somehow pie-iron pizzas and blueberry pies, while fun camping food, just weren't quite the Birthday Dinner I had envisioned for the King of this Castle.  So last night I thought we'd have a belated birthday dinner:  BBQ Tri-Tip, Grilled Zucchini, Grilled Caprese Salad and Home-made Peach Ice Cream.

I started by making the Ice Cream.  However, I had misplaced my recipe.  So I called my friend, three time-zones away, and asked her for it.  She kindly texted me the recipe.  I had another question, called and left a message, and proceeded to make the Ice Cream.

Then I prepped the charcoal grill and got the Tri-Tip on it; started the Ice Cream freezer and prepped the Zucchini and the Caprese Salad.

Well, the Tri-Tip was done now.  I went out to take it off the grill with the bbq tongs.  You know how you're not supposed to use a fork to lift the meat because the juices might run out?  Well, I was being a good girl and using tongs for this very reason.

Only when I lifted the grill lid, the fatty layer on the meat flared up and caught fire.  (That's the Flambe' part.)

And the meat was too thick to grasp securely with the tongs.  This is when it hit the pavement.  (That's the Pave' part).

Oh and of course, Elder Daughter was freaking out because here was our roast, in flames, on the ground, with small bits of flaming fat that had fallen off sprinked about, cheerily burning on the cement.

And the phone was ringing.  My friend, three time-zones away, was returning my call about the Ice Cream.

I think I'll just draw a curtain over this hectic scene...


Here's how I made the Grilled Caprese Salad:

You'll need
Tomatoes
Mozzarella
Black Pepper
Balsamic Reduction
Basil

I sliced my Tomatos thickly, about 1/4-inch thick, maybe slightly more, and topped each slice with a 1/4-inch thick piece of Fresh Mozzarella and sprinkled it all with Black Pepper.


Then I placed the Tomatoes on the grill.  If you use Fresh Mozzarella, place each slice over the hotter portion of the grill and watch carefully.  If you use traditional Mozzarella, place it over the cooler portion of the grill.  Fresh Mozzarella has a higher water content and by placing it over the hotter temperature you will be able to evaporate off the water.  Just watch it closely.  The idea is to just gently melt the cheese.


When the Mozzarella is soft and gently melted, remove from grill and place on the serving platter.  Drizzle with a Balsamic Reduction and top with Basil (fresh is best, of course).  I followed The Pioneer Woman's suggestion for making the reduction, which is to simply boil 2 Cups Balsamic Vinegar until you have 1 Cup left.  I did this and have been storing it uncovered in the fridge, which has allowed it to continue to thicken slightly. 

Warm Tomatoes, gooey Mozzarella, cool Balsamic, crisp Basil....
MMM-mmm...

And you can skip using tongs on the Tri-Tip.  Unless you want Flambe' Tri-Tip Pave'.

Grilled Zucchini with Caper-Oregano Dressing


Zucchini
Olive Oil
Sea Salt
Black Pepper

Slice Zucchini in half, then cut each half into 1/4-inch-thick slabs; place in bowl.  Toss with Olive Oil and sprinkle with Sea Salt and Pepper.  Grill Zucchini slabs until cooked through to desired doneness, flipping once while cooking, about 10 minutes total.  Transfer back to prep bowl.  Using kitchen shears, roughly chop the Grilled Zucchini into bite-sized pieces.  Toss with Dressing.  Taste, adding more Sea Salt and Pepper as needed.

Dressing:
1  Tablespoon  Red Wine Vinegar
1  Tablespoon  Olive Oil
2  teaspoons  Capers, drained

1 1/2  teaspoons  Fresh Oregano, or dried Oregano to taste


Zucchini slabs before Grilling